
Creating a Custom Lease Template in Rent Perfect: Step-by-Step Guide
There are some things I want to change in the Standard lease template. How do I create my own custom lease template?
Follow this step-by-step guide to create your own custom lease template.
Creating a Custom Lease Template in Rent Perfect
Think of a lease template as your personalized lease blueprint—it saves the standard terms and conditions you typically include in every lease, so you don't have to start from scratch each time. Once a tenant is approved, you’ll use the “Prepare Lease” option to enter specific details like lease dates, rent amount, and security deposit.
Rent Perfect provides a comprehensive standard lease template to get you started. But we know that no two landlords—or properties—are exactly alike. Whether you're following unique state regulations or simply have a preferred way of managing your rentals, the Rent Perfect Custom Lease Creator gives you the flexibility to design the lease that works best for you.
With a custom lease template, you can:
- Edit the language in each section to reflect your policies
- Remove sections that don’t apply to your property
- Add new sections that address your unique needs
Creating a lease that matches your management style and complies with local laws has never been easier. Let’s walk through the steps to build your Perfect lease.
CREATING A CUSTOM LEASE TEMPLATE
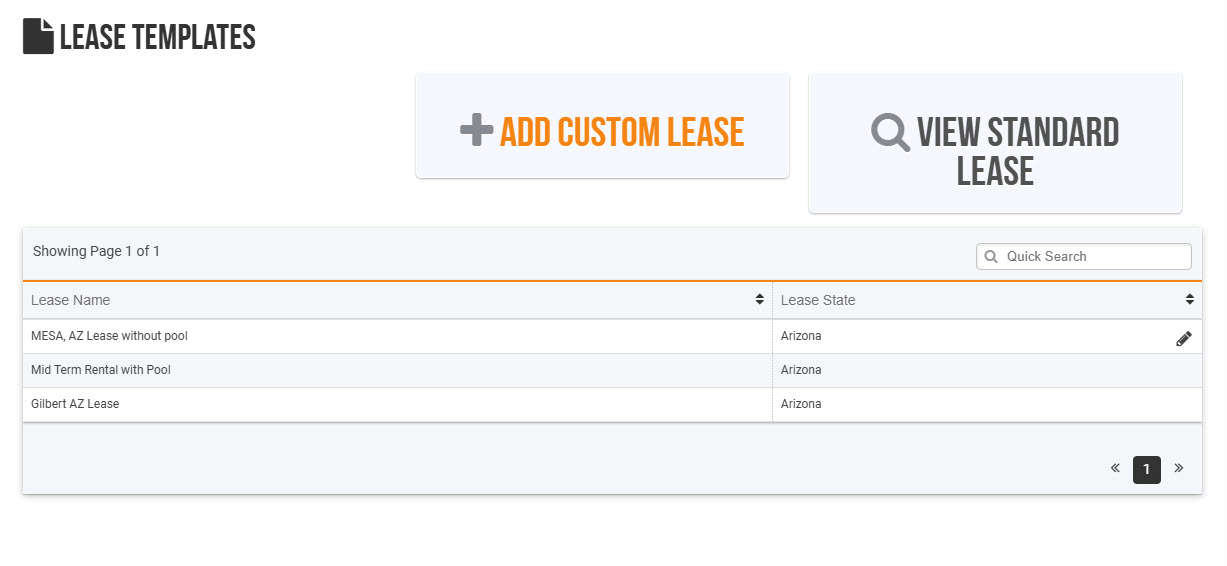
Step 1: Log into your Rent Perfect account and click "Lease Templates" under Rental Settings.
If you’d like to tailor the lease to better fit your property or management style, you can create your own version by clicking “Add Custom Lease.” This allows you to fully customize the terms, edit sections, remove clauses, or add your own—all to ensure the lease aligns with your unique needs.

Click “Create Template Now” to start building your customized lease template and tailor it to fit your unique rental needs.

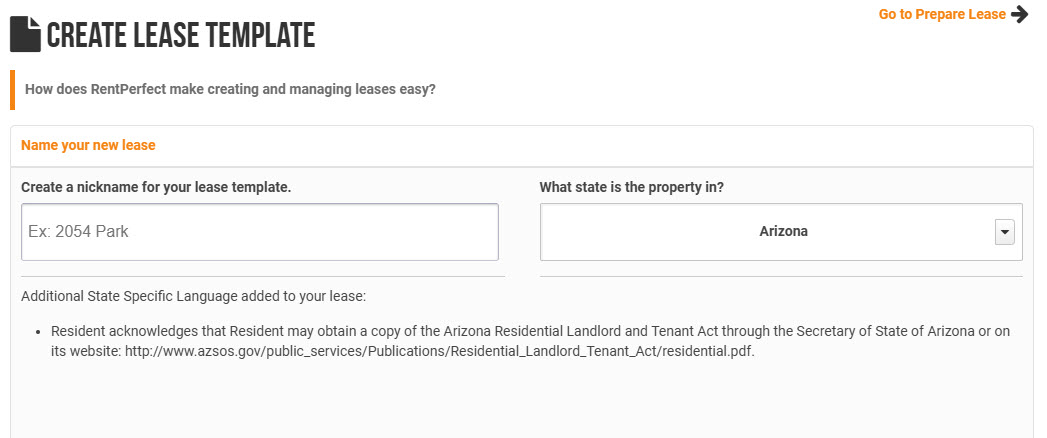
Step 3: Start by entering a name for your lease template, selecting the applicable state the property resides in.
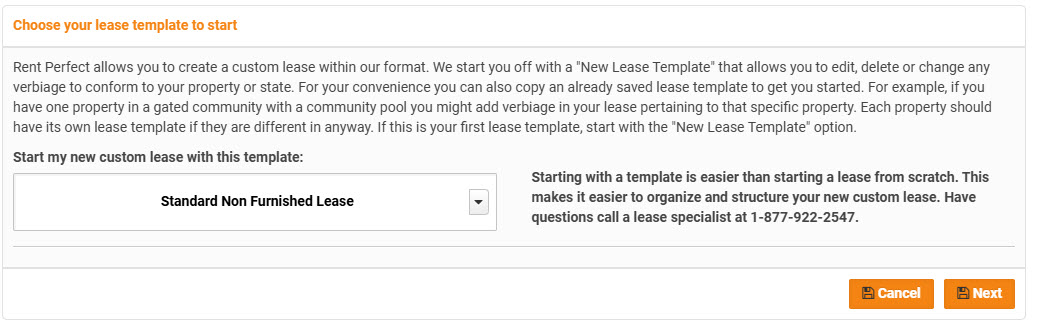
Step 4: Choose a lease template to start with.
You can choose to start with a Rent Perfect Standard Lease template or a custom template you previously created. This will give you a head start so you do not have to start a lease template from scratch.
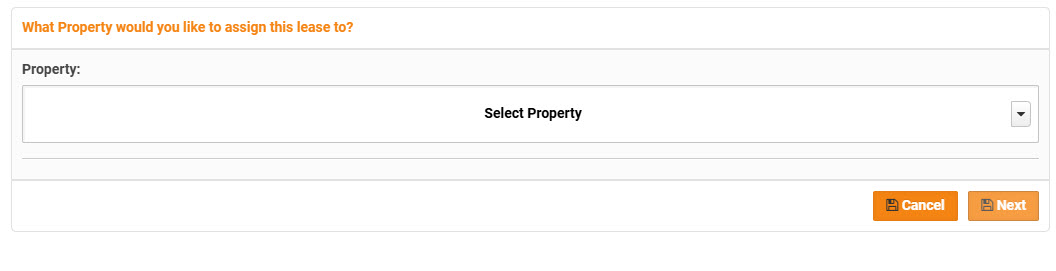
Step 5: Assign the lease to a property address.
Next, assign the lease template to a property address. This helps the system link the lease template to the correct rental property. This step is optional. If you’re not ready to assign it to a specific property just yet, no worries—you can always do it later.
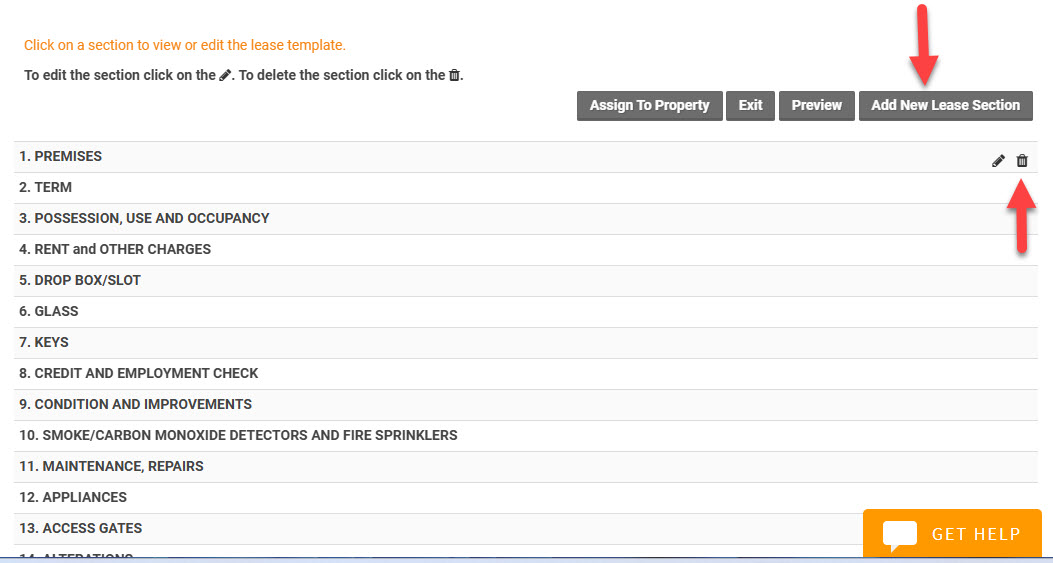
Step 6: View and manage Lease Sections
On the next screen, you’ll see a list of sections included in the Rent Perfect standard lease template.
- Click on any section to view or edit its content.
- To remove a section, simply click the trash can icon on the far right.
- Want to add your own terms? Click “Add New Lease Section” to create a custom section tailored to your property or management style.
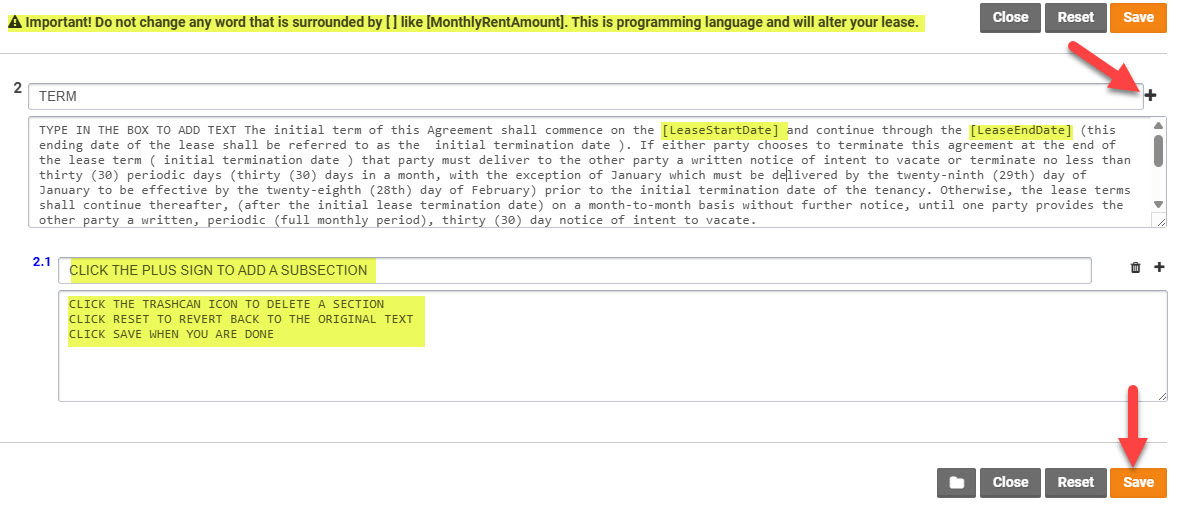
Step 7: Editing a lease section
To make changes to any section, simply click inside the text box and begin typing. Use the plus (+) icon to add a subsection, or click the trash can icon to remove one. If you want to revert to the original standard text, click “Reset.” When you’re done editing, click “Save” to apply your changes.
Tip: Need help inserting programmable fields? Click the folder icon to view a list of available fields you can use in your lease.
IMPORTANT: Throughout the template you will see place holder programming code such as, [LeaseStartDate], [LeaseEndDate], [TotalMonthlyPayment]. This code is used to automatically insert specific lease details when you prepare documents for a tenant later on. Be sure not to delete or modify the code—leaving it in place ensures the system can accurately fill in the necessary information later.
Step 8: Viewing and Editing a Lease Template later on
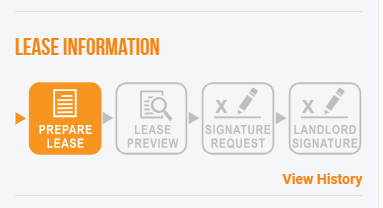
Step 9: Preparing a Digital Lease for an Approved Tenant
When you're ready to create a lease for an approved tenant follow these steps:
1. Go to the View Reports screen and locate the tenant's name.
2. Click “Prepare Lease” under the tenant's lease information.
3. Follow the steps to add lease specific details like lease dates, rent amount, and deposit amount. The Rent Perfect system will then automatically fill in your custom lease template using this information and generate a ready-to-sign digital lease.
Click here for a step-by-step guide on how to generate a Rent Perfect digital lease.
Need Help?
We're here for you! Contact us at [email protected] or call 877-922-2547—we’re always happy to help.
HELPFUL LINKS:
How do I add a rental property address into my account?
Where does my tenant view and sign the lease agreement?
How do I prepare a lease agreement for a tenant?
Leave a comment?
